Connections
Xolmis works with SQLite database files. Each database file is an independent set of data, and users may have multiple databases, which we call connections. Only one connection can be opened at a time, ensuring that all actions are linked to a single dataset for consistency and traceability.
Managing connections
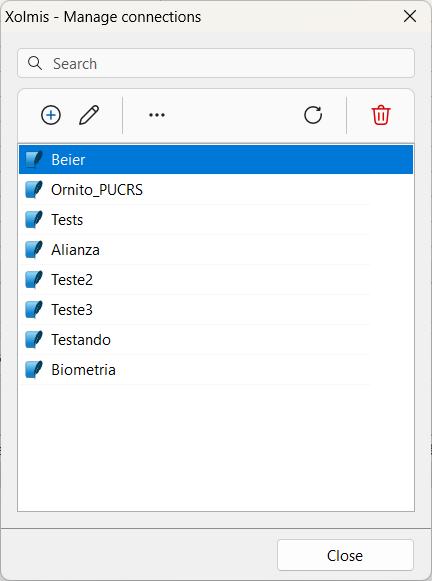
Open the connections dialog in the menu: File → Manage connections. This dialog allows you to create, edit, and delete connections, as well as configure access credentials.
Creating a new database
To create a new database file and connection:
- Click the Add button and select New database. Alternatively, open the dialog via File → New database.
- In the dialog, click the Open button of the Database file field to define the filename and location of the new database.
- Provide a Connection name to identify the database.
- Optionally, add the Author and a Description for documentation purposes.
- Click the Create database button to generate the file and proceed.
Create a administrator user:
- Provide a username and password.
- Click the Create user button to finish the database creation process.
Adding a connection for an existing database
To add a connection to an existing database:
- Click the Add button .
- The Edit connection dialog will open.
- Fill in the fields as follows:
| Field | Required | Description |
|---|---|---|
| Connection name | Yes | Short name to identify the connection |
| Database type | Yes | Currently only SQLite is supported (future versions may add other databases) |
| Remote database | Check if the database is hosted on another computer | |
| Server | IP address or hostname of the remote computer (default: localhost) | |
| Port | Communication port of the remote server | |
| Database file | Yes | Path to the database file or database name on the server |
| Username and password | Authentication credentials, if required |
Click Save to confirm the connection or Cancel to discard changes.
Editing an existing connection
To edit a connection:
- Select the connection in the list.
- Click the Edit button .
- Modify the fields as needed.
- Click Save to apply changes.
Deleting a connection
To delete a connection:
- Select the connection in the list.
- Click the Delete button .
- Confirm the deletion.
Warning
Deleting a connection does not delete the database file itself, only the saved link to it. Be cautious when removing connections to avoid losing access to important datasets.
Opening a connection
When Xolmis starts, it displays the Connection dialog.
- Select a connection from the list.
- Enter your username and password for the selected connection.
Tip
If you frequently connect to the same database (or only have one connection), enable the option to save the last used connection in the Settings. This also applies to the username, making login faster.
While running Xolmis, you can switch to another database in the main menu File → Connect to database or using the shortcut Ctrl+Alt+O. This will close the current connection and open the selected one.
Best practices
- Use descriptive connection names: Helps identify databases quickly, especially when managing multiple projects.
- Avoid using the admin account: Create standard users for daily work to maintain security.
- Document connections: Use the description field to note project details, scope, or collaborators.
- Backup databases regularly: Connections only link to files; ensure the files themselves are safely stored.
- Use remote connections carefully: When connecting to databases on other computers, verify network stability and security.
Relation to other modules
Connections are the foundation of Xolmis. All modules (Sightings, Captures, Nests, Projects, etc.) depend on the active connection to store and retrieve data. By managing connections properly, researchers ensure that their work is organized, secure, and easily accessible across different datasets.